
Modern Java services often hit shared databases, external APIs, or ML models repeatedly. A great cache cuts latency and cost, but in Kubernetes, you also need node discovery, failure handling, and consistent data distribution. This guide shows how to implement distributed caching on Kubernetes using JCacheX — a high‑performance Java cache with Kubernetes‑native discovery built on the official Kubernetes Java client.
What you’ll build
- A production‑ready distributed cache cluster inside Kubernetes
- Native node discovery using Kubernetes APIs (no HTTP scraping)
- Consistent hashing, health awareness, and graceful scaling
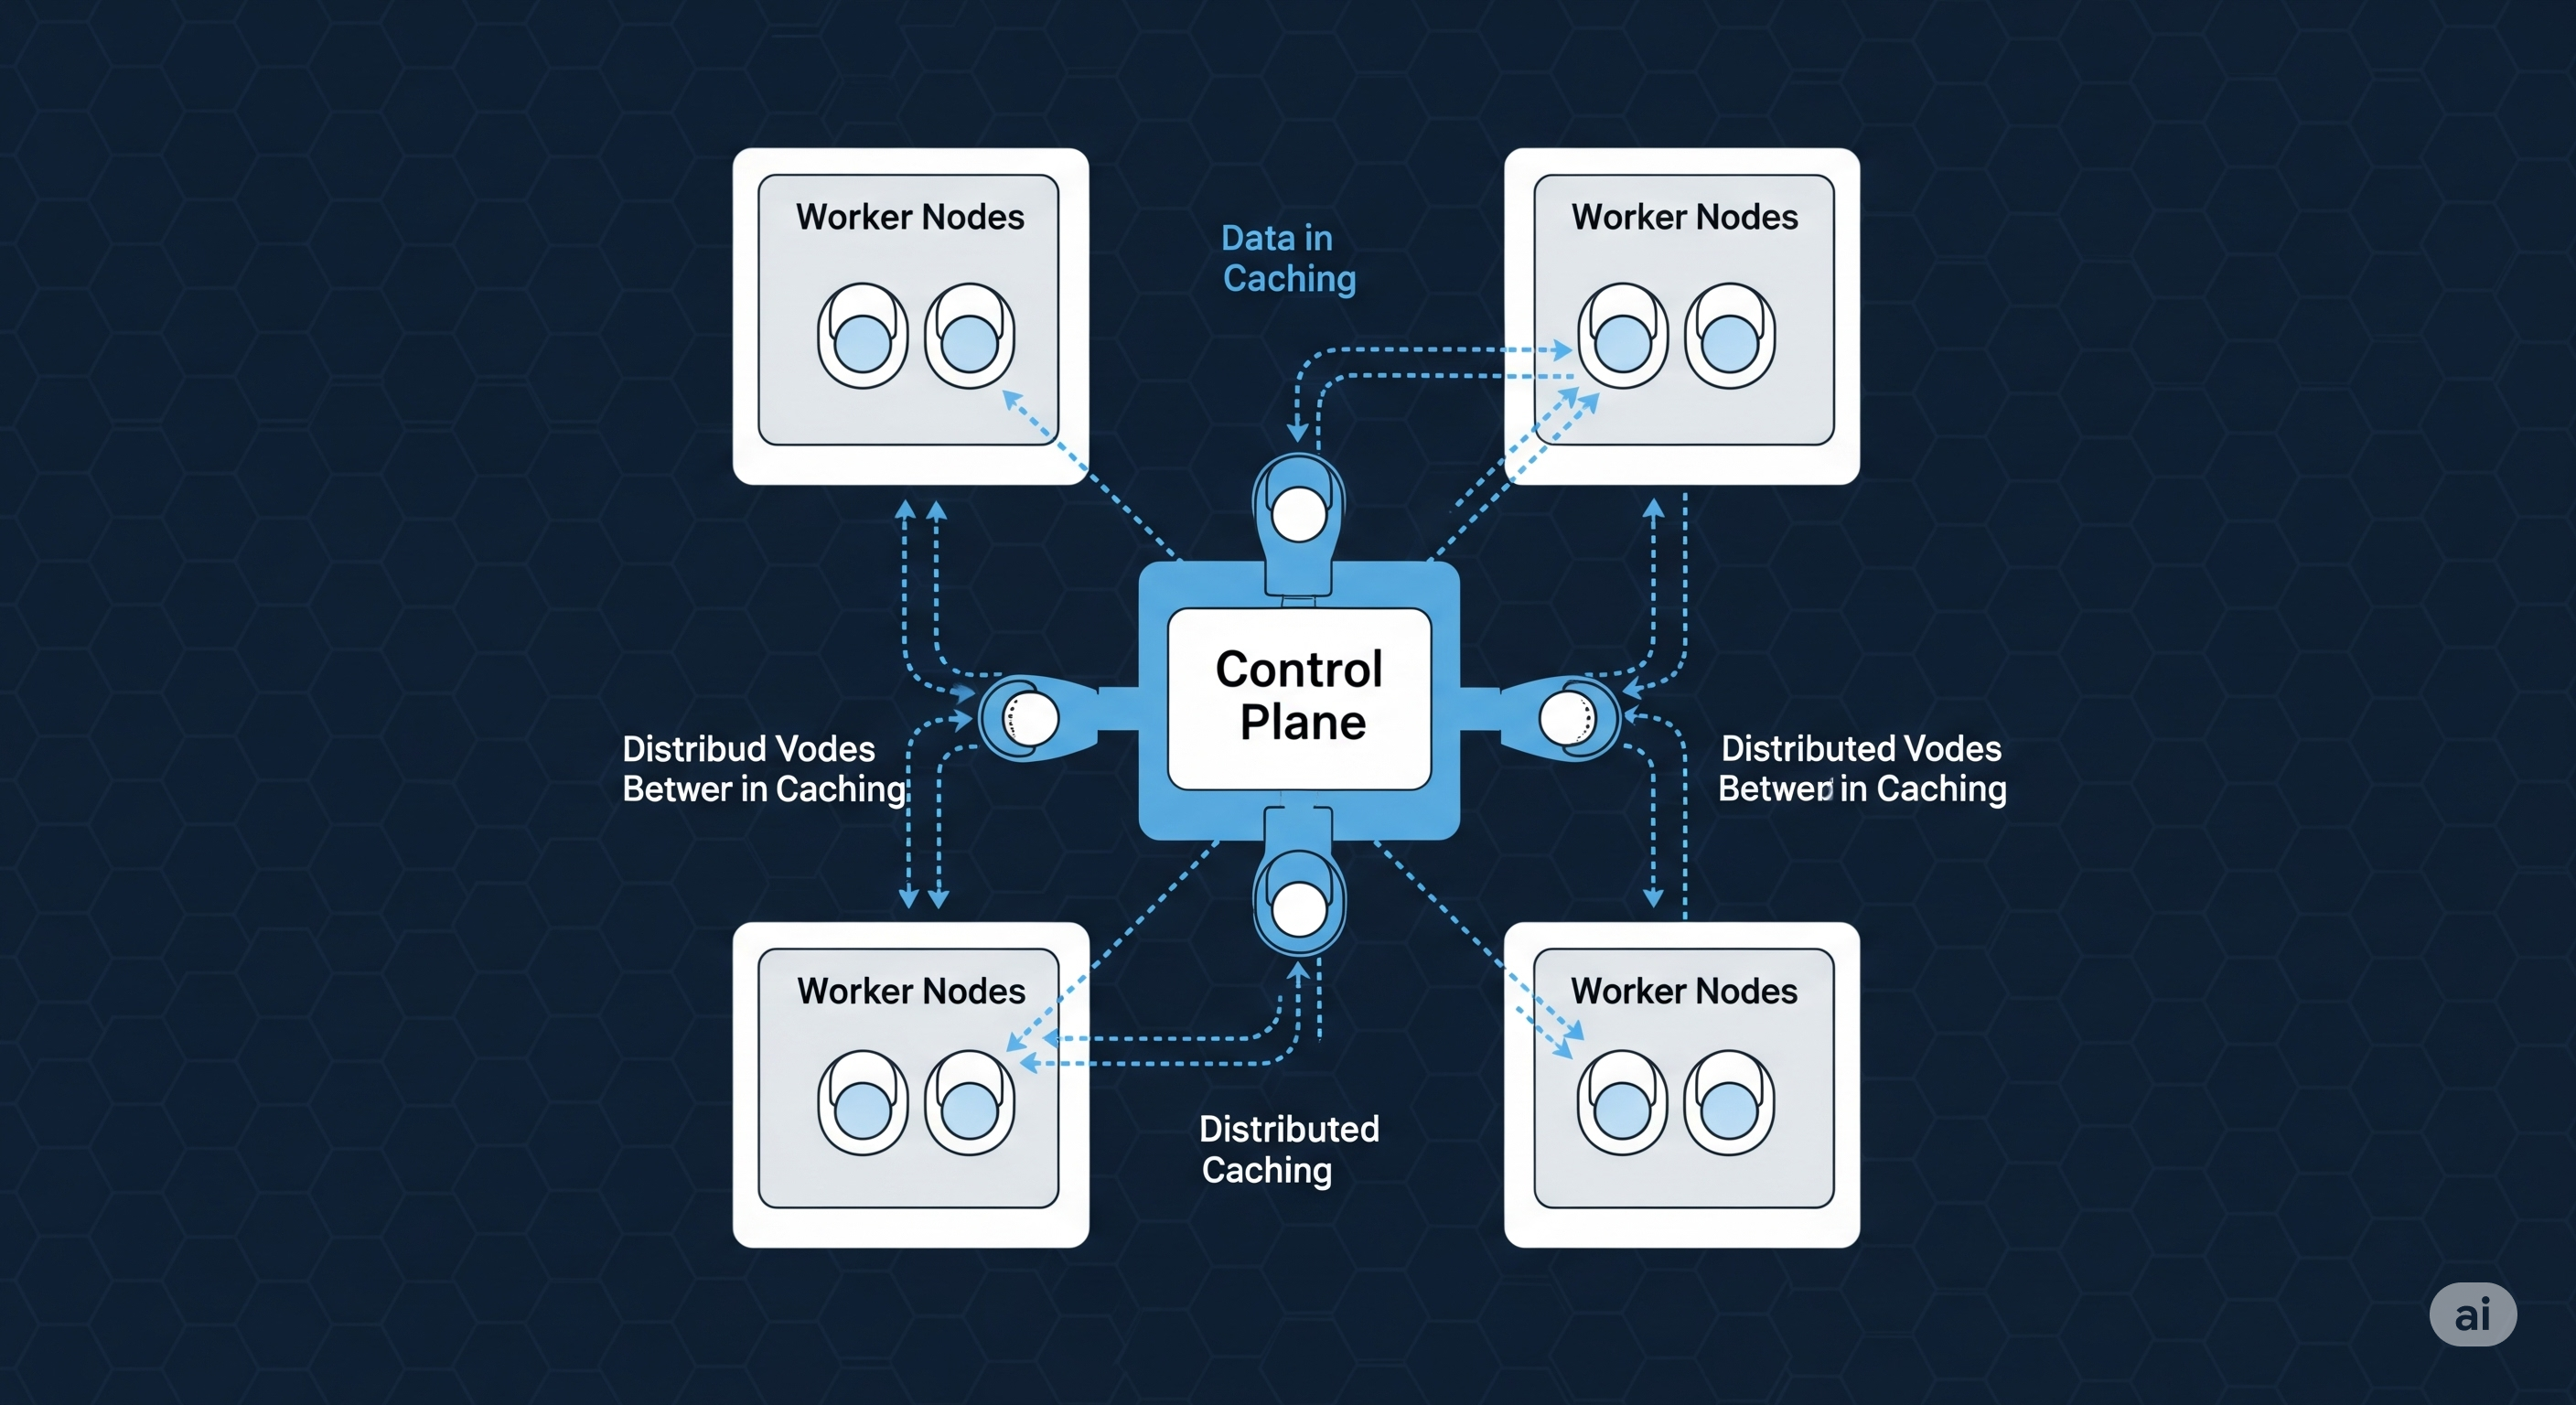
Why JCacheX on Kubernetes
- Native Kubernetes node discovery powered by the official Java client
- Consistent hashing with virtual nodes for balanced key distribution
- Same simple Cache API from local to distributed
- Rich stats, async operations, and Spring Boot integration
1) Add dependencies
![]()
<!-- Maven -->
<dependency>
  <groupId>io.github.dhruv1110</groupId>
  <artifactId>jcachex-core</artifactId>
  <version>2.0.1</version>
  <scope>compile</scope>

  <!-- JCacheX uses the official Kubernetes Java client under the hood for discovery -->
</dependency>
![]()
// Gradle
implementation "io.github.dhruv1110:jcachex-core:2.0.1"
Optional modules: jcachex-spring for Spring Boot, jcachex-kotlin for Kotlin DSL.
2) Start local, then go distributed
You can begin with an in‑memory cache:
![]()
import io.github.dhruv1110.jcachex.*;

Cache<String, String> cache = JCacheXBuilder.create()
    .name("users")
    .maximumSize(1000L)
    .build();

cache.put("user:1", "Alice");
String v = cache.get("user:1");
When you’re ready to scale out on Kubernetes, switch to the distributed API with the same get/put calls.
3) Distributed cache for Kubernetes (Java)
![]()
import io.github.dhruv1110.jcachex.distributed.DistributedCache;
import io.github.dhruv1110.jcachex.distributed.impl.KubernetesDistributedCache;
import io.github.dhruv1110.jcachex.distributed.discovery.NodeDiscovery;
import io.github.dhruv1110.jcachex.distributed.communication.TcpCommunicationProtocol;

DistributedCache<String, String> cache = KubernetesDistributedCache.<String, String>builder()
    .clusterName("jcachex-cluster")
    .partitionCount(1024)
    .networkTimeout(java.time.Duration.ofSeconds(2))
    .nodeDiscovery(
        NodeDiscovery.kubernetes()
            .namespace("default")
            .labelSelector("app=jcachex-node") // discover only your cache pods
            .build()
    )
    .communicationProtocol(new TcpCommunicationProtocol.Builder<String, String>()
        .port(8081) // cache port (separate from your web server)
        .build())
    .build();

cache.put("user:1", "alice");
String v = cache.get("user:1");
What’s happening:
KubernetesDistributedCacheuses pod identities and a consistent hash ring.NodeDiscovery.kubernetes()relies on the official Kubernetes Java client to list pods via label selector and track health/readiness.TcpCommunicationProtocolperforms inter‑node RPC on the configured port (default commonly 8081).
4) Kubernetes manifests
Headless Service (recommended for discovery)
![]()
apiVersion: v1
kind: Service
metadata:
  name: jcachex-service
  labels:
    app: jcachex-node
spec:
  clusterIP: None  # headless service for stable DNS over pod IPs
  selector:
    app: jcachex-node
  ports:
    - name: cache
      port: 8081
      targetPort: 8081
Deployment
![]()
apiVersion: apps/v1
kind: Deployment
metadata:
  name: jcachex-deployment
spec:
  replicas: 3
  selector:
    matchLabels:
      app: jcachex-node
  template:
    metadata:
      labels:
        app: jcachex-node
    spec:
      serviceAccountName: jcachex-sa
      containers:
        - name: app
          image: your-registry/your-app:latest
          ports:
            - containerPort: 8080   # your HTTP server (if any)
            - containerPort: 8081   # JCacheX TCP protocol
          readinessProbe:
            tcpSocket:
              port: 8081
            initialDelaySeconds: 5
            periodSeconds: 5
          resources:
            requests:
              cpu: "250m"
              memory: "256Mi"
            limits:
              cpu: "1"
              memory: "1Gi"
Minimal RBAC for pod discovery
![]()
apiVersion: v1
kind: ServiceAccount
metadata:
  name: jcachex-sa
---
apiVersion: rbac.authorization.k8s.io/v1
kind: Role
metadata:
  name: jcachex-discovery
rules:
  - apiGroups: [""]
    resources: ["pods"]
    verbs: ["get", "list", "watch"]
---
apiVersion: rbac.authorization.k8s.io/v1
kind: RoleBinding
metadata:
  name: jcachex-discovery-binding
roleRef:
  apiGroup: rbac.authorization.k8s.io
  kind: Role
  name: jcachex-discovery
subjects:
  - kind: ServiceAccount
    name: jcachex-sa
5) Spring Boot integration (optional)
Use the builder directly in a configuration class, as in the examples:
![]()
import io.github.dhruv1110.jcachex.distributed.DistributedCache;
import io.github.dhruv1110.jcachex.distributed.discovery.NodeDiscovery;
import io.github.dhruv1110.jcachex.distributed.communication.TcpCommunicationProtocol;
import io.github.dhruv1110.jcachex.distributed.impl.KubernetesDistributedCache;
import org.springframework.context.annotation.*;

@Configuration
public class CacheConfig {
  @Bean
  public DistributedCache<String, String> distributedCache() {
    return KubernetesDistributedCache.<String, String>builder()
        .clusterName("jcachex-kubernetes-example")
        .nodeDiscovery(NodeDiscovery.kubernetes().namespace("default").build())
        .communicationProtocol(new TcpCommunicationProtocol.Builder<String, String>()
            .port(8081)
            .build())
        .build();
  }
}
YAML excerpt for clarity:
jcachex:
  distributed:
    enabled: true
    communication:
      tcp:
        port: 8081
    discovery:
      kubernetes:
        namespace: default
        enabled: true
6) Operations and best practices
- Set a headless
Serviceand a clearlabelSelectorfor precise discovery. - Separate the cache TCP port (e.g., 8081) from your web server port.
- Allocate resource requests/limits to avoid eviction and noisy‑neighbor issues.
- Tune
.partitionCountand.networkTimeoutbased on p99 latency goals. - Monitor stats: hit/miss, evictions, per‑node latencies, and network failures.
- Roll out changes with identical versions across pods to minimize churn.
7) How JCacheX discovers nodes (under the hood)
JCacheX uses the official Kubernetes Java client to list pods and infer health from pod phase and the Ready condition. Discovered nodes are tracked and health‑checked periodically. This avoids brittle HTTP scraping and works with RBAC‑scoped access in production clusters.
8) Wrap‑up
Distributed caching on Kubernetes doesn’t have to be complex. With JCacheX you get a clean API, Kubernetes‑native discovery, and production‑grade features out of the box. Start local, scale to a multi‑pod cluster, and keep latency predictable.
- Docs:
https://dhruv1110.github.io/jcachex/ - Repository:
https://github.com/dhruv1110/jcachex